
This article explains how a system admin adds a custom form (e.g., a borrower agreement, authorization, or disclosure) so borrowers see and accept it during POS application submission.
Who can do this: System Administrator
Step 1: Create the Print Form
- Go to Settings > Forms.
- Click Create (or Copy an existing form).
- Set the form Category “Borrower Agreement”.
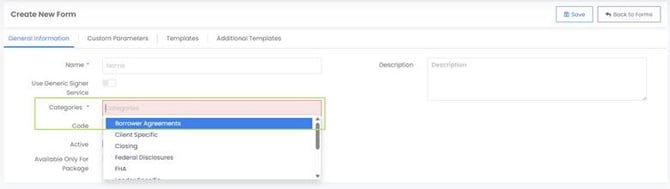
- Build the template content using the HTML or DOCX editor. Use [ParameterKey] merge fields (e.g., _loanBorrowerFullName) to pull in loan data. See the Print Form Parameter Catalog for available keys.
- Click Save.
- Confirm the form is set to Active, inactive forms won't appear as an option in POS settings or to borrowers.
Step 2: Attach the Form to POS
- Go to Settings > POS (Company Portal settings).
- Open the Borrower Agreements (Consent Forms) section.
- Click Add and select the print form you created in Step 1.
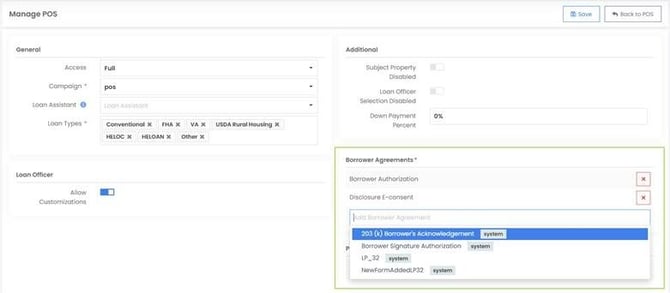
The form now loads dynamically on the POS submit page, and borrowers must acknowledge it before submitting their application.
Notes
- System forms (host-level) vs. company forms: company admins can only customize settings (active/parameters) on system forms; they can't edit the underlying template. To fully customize content, create a company-level form or clone a system form first.
- If a form doesn't show up in POS, check that it's Active and correctly categorized as Borrower Agreement.
- Form Conditions should be limited to the data available in the POS.
- If a merge parameter shows blank on the generated form, verify the loan has that data populated and that the parameter key spelling/case matches the catalog.